

2. Create the contact template
A template is the email Frontmail builds from what the visitor typed: HTML with placeholders
like {{name}}, plus the subject and recipients. Your form only sends the values; the look of the
email lives in the dashboard, so you can change it without touching your website.
Start from the gallery
Section titled “Start from the gallery”-
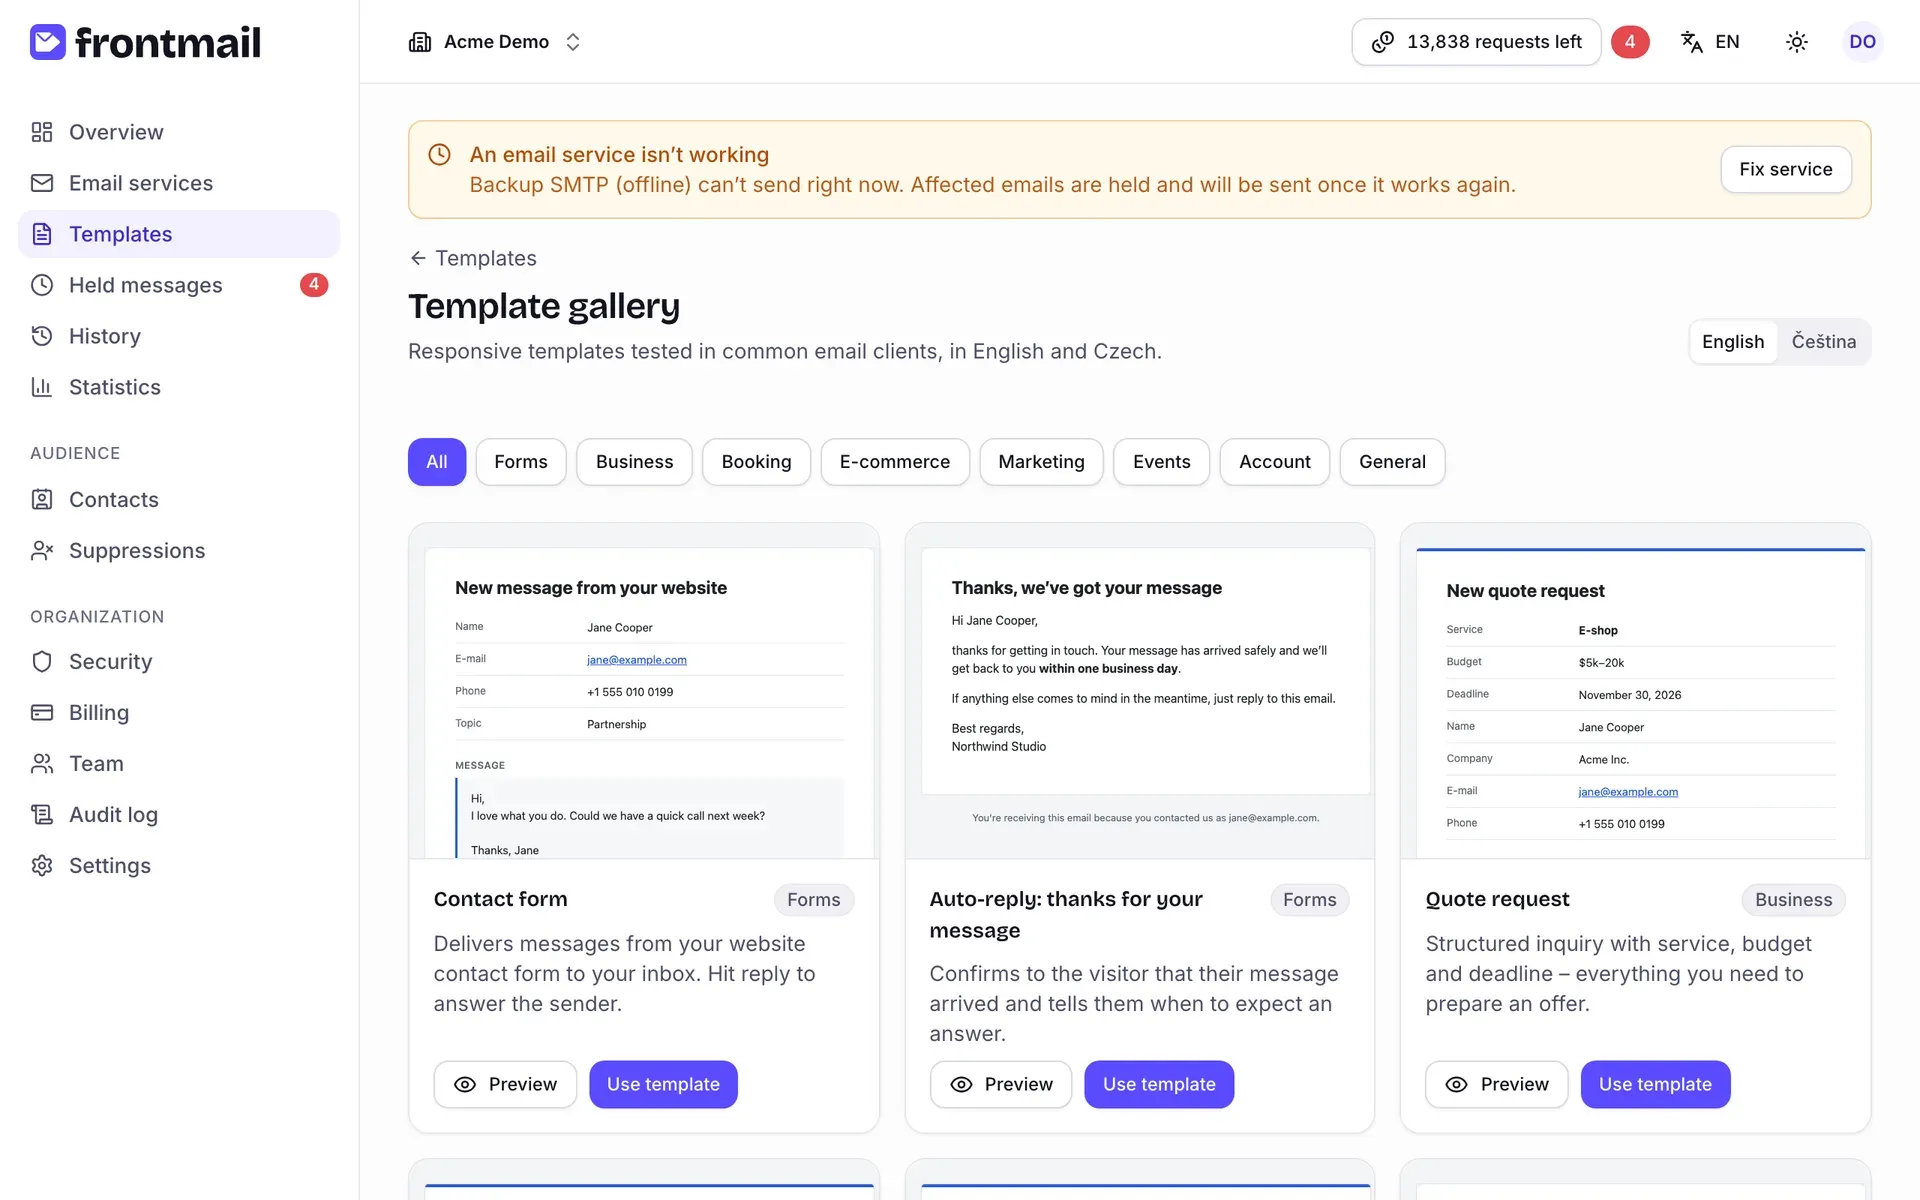
Open Templates and click From gallery.
-
Pick the language of the email at the top (English or Čeština), then find Contact form in the Forms category. Preview shows it filled with sample data; click Use template.
-
The template opens in the editor, already saved as version v1. Frontmail has made a few choices for you:
- To is your own sign-in address, so messages arrive in your inbox,
- Reply-To is
{{name}} <{{email}}>– when you hit Reply, the answer goes to the visitor, - the Service is your default service,
- Require CAPTCHA (Turnstile) is off for now – you’ll turn it on with your own Turnstile keys in step 4.
Look around the editor
Section titled “Look around the editor”The Content tab has the Subject on top, the code on the left and a live preview on the right. The preview shows the subject, recipients and the rendered email, on Desktop or Mobile and in Light or Dark mode.
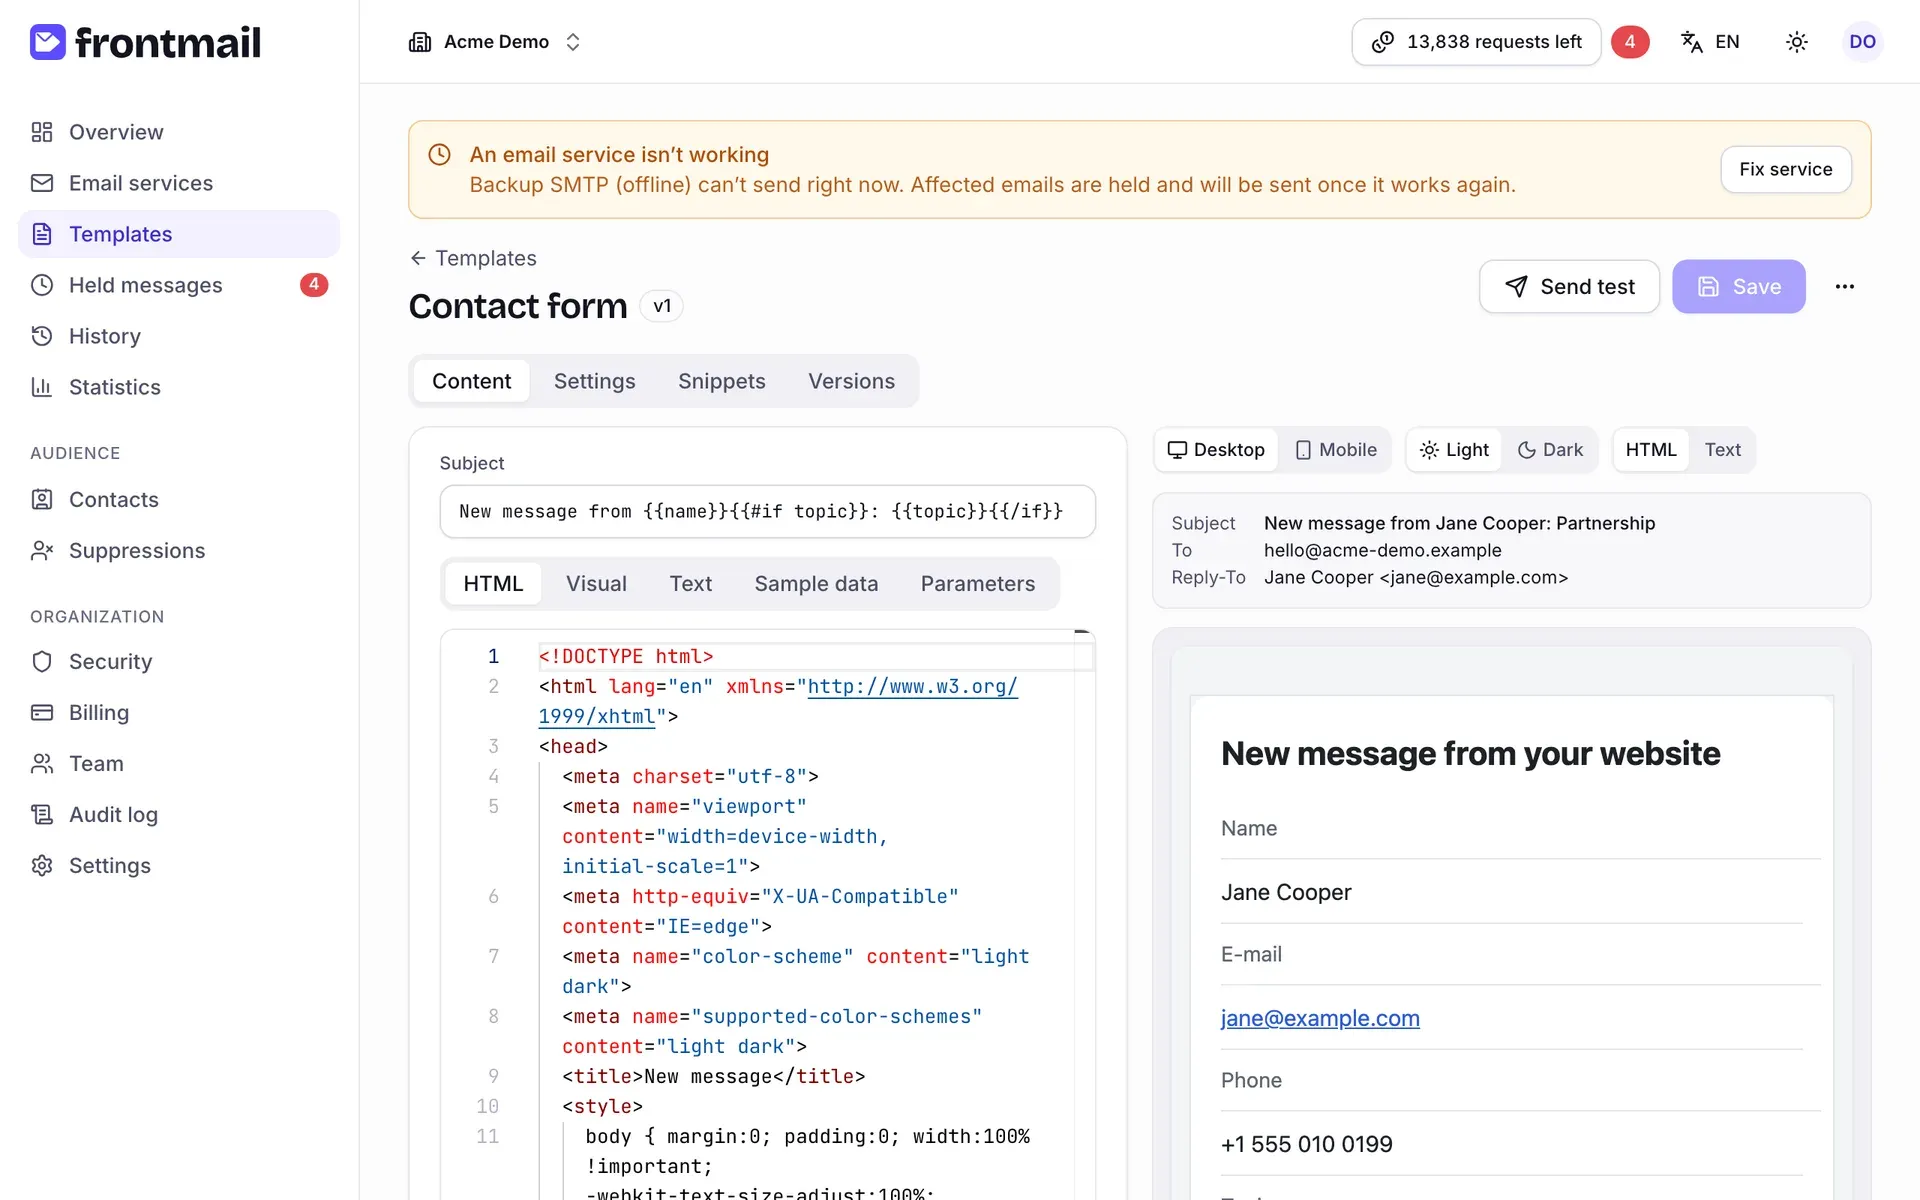
The Contact form template expects these parameters – the values your form will send:
| Parameter | Type | Required | What it is |
|---|---|---|---|
name |
string | yes | The visitor’s name |
email |
yes | The visitor’s address (validated) | |
phone |
string | no | Phone number |
topic |
string | no | Topic, shown in the subject when filled |
message |
text | yes | The message itself |
Parameters that are required must be in every request, otherwise Frontmail answers with a validation error and sends nothing. Optional ones simply disappear from the email when empty. You can change all of this on the Parameters tab – see Parameters.
Try it with sample data
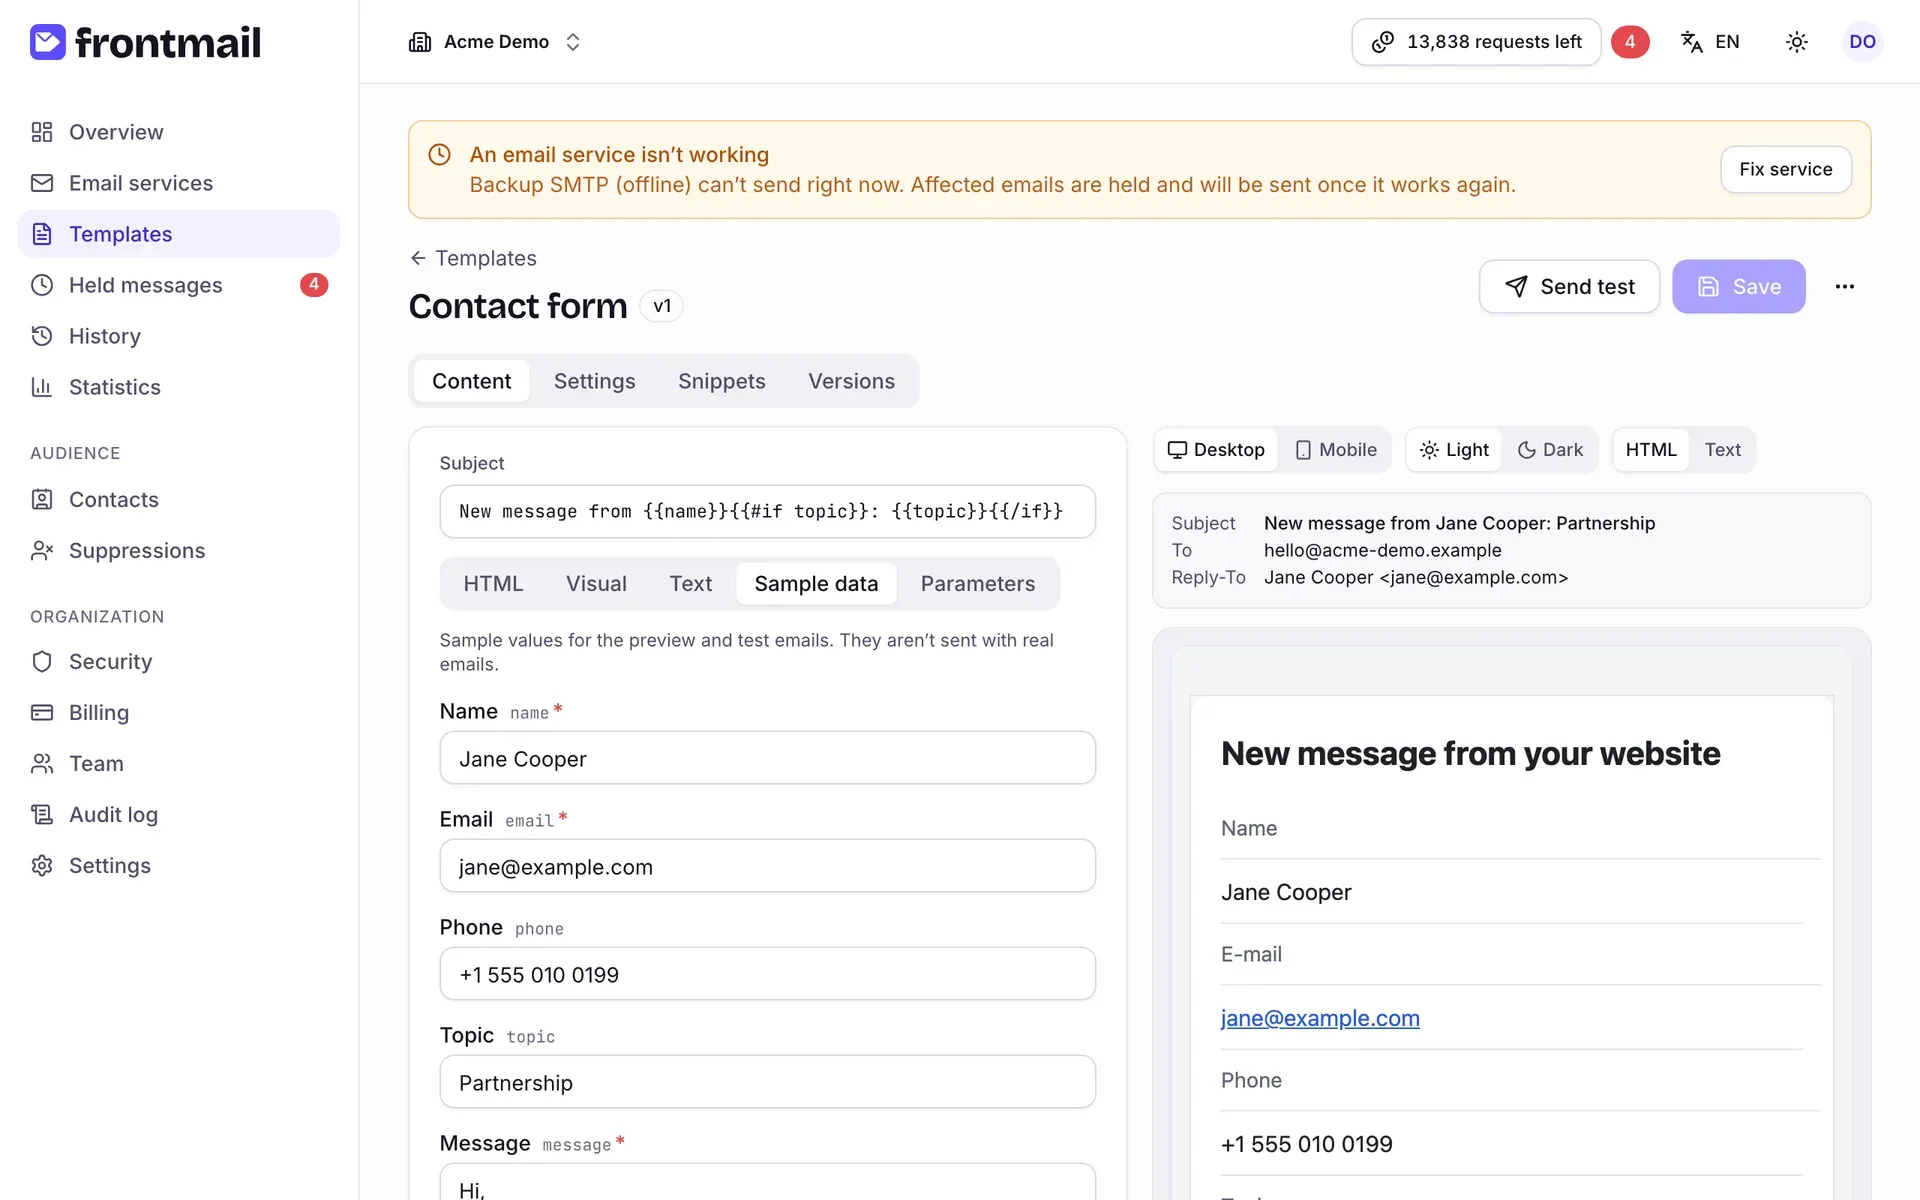
Section titled “Try it with sample data”Switch to Sample data. These values feed the preview and test emails – they’re never sent with real submissions. Change the name or the message and the preview updates as you type.
Check the recipient and save
Section titled “Check the recipient and save”-
Open the Settings tab. In the Message section, check that To is the inbox where you want to receive messages. Separate several addresses with commas.
-
Leave Reply-To as
{{name}} <{{email}}>(or just{{email}}). Keep From email empty unless your service lets you send from another address. -
Press Save or Ctrl/⌘ + S. Every save creates a new version (the badge next to the name changes to v2) – you can compare and restore versions on the Versions tab.
More about the editor: Template editor.