

Account settings
Settings (at the bottom of the sidebar) combines your personal account settings with the settings of the current organization. The links at the top of the page jump to each section: Profile, Notifications, Organization, Security, Sessions and Account.
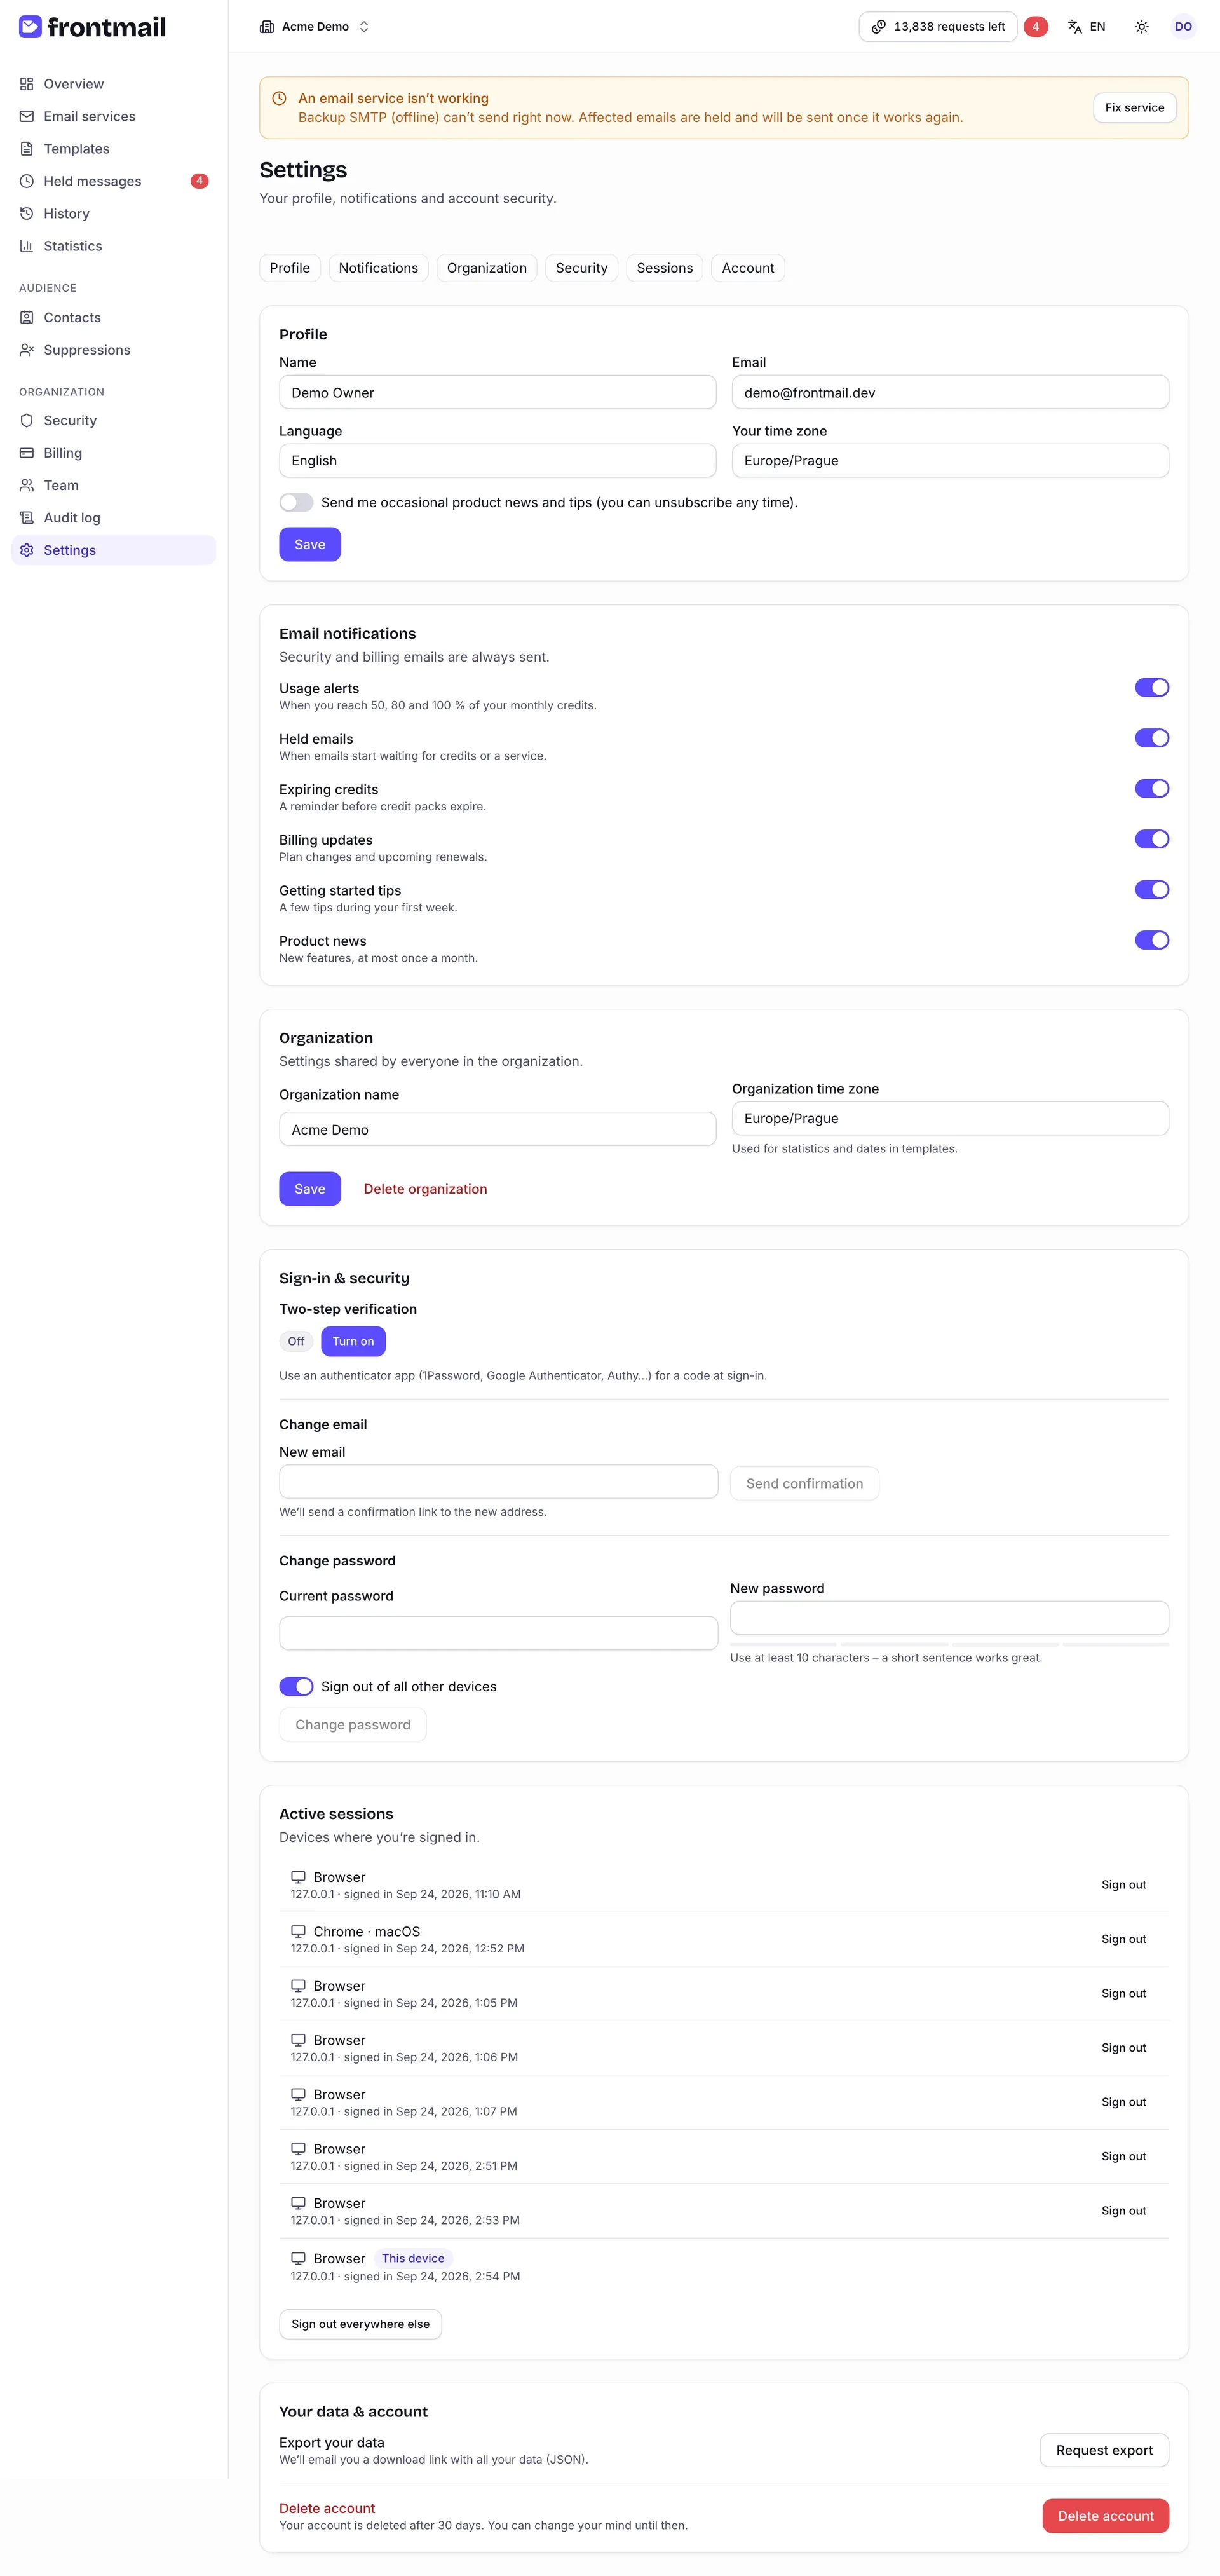
Everything except the Organization section applies to you personally, in every organization you belong to.
Profile
Section titled “Profile”| Field | Meaning |
|---|---|
| Name | Shown to your team, e.g. in the members list. |
| Your sign-in address (read-only here – see How to change your email). | |
| Language | English or Čeština – the language of the dashboard. |
| Your time zone | Used to show dates and times to you. |
There’s also a switch for occasional product news and tips. Click Save to apply the changes.
Notifications
Section titled “Notifications”Email notifications lets you turn optional emails on and off. Each switch is saved immediately.
| Switch | When you get the email |
|---|---|
| Usage alerts | When you reach 50, 80 and 100 % of your monthly credits. |
| Held emails | When emails start waiting for credits or a service. |
| Expiring credits | A reminder before credit packs expire. |
| Billing updates | Plan changes and upcoming renewals. |
| Getting started tips | A few tips during your first week. |
| Product news | New features, at most once a month. |
Security and billing emails – for example about a failed payment – are always sent. See Billing notifications.
Organization
Section titled “Organization”Settings shared by everyone in the current organization:
- Organization name,
- Organization time zone – used for statistics and for dates in templates.
Owners and admins can change them and click Save; other roles see them read-only.
How to delete the organization
Section titled “How to delete the organization”Only the owner sees Delete organization.
- Click Delete organization.
- Read the warning, then type the organization’s name into the confirmation field.
- Click Delete organization.
The subscription is cancelled right away, auto top-up is switched off and all data – templates, history, contacts, keys – is deleted after 30 days. Remaining credits are lost. Export anything you need first.
Sign-in & security
Section titled “Sign-in & security”How to turn on two-step verification
Section titled “How to turn on two-step verification”Two-step verification asks for a code from an authenticator app (1Password, Google Authenticator, Authy, …) whenever you sign in – with a password, an emailed link or Google / GitHub. Your email address must be verified first. More in Multi-factor authentication.
- Under Two-step verification, click Turn on.
- Enter your Password and click Next.
- Scan the QR code with your authenticator app. If you can’t scan it, type in the key shown below the code.
- Enter the 6-digit Authentication code from the app and click Verify.
- Save your backup codes – copy them somewhere safe. Each code signs you in once if you lose your phone, and you won’t see them again. Click I’ve saved them.
The status badge changes from Off to On.
- New backup codes – after confirming your password, you get a fresh set; the old codes stop working.
- Turn off – after confirming your password, sign-in no longer asks for a code.
How to change your email
Section titled “How to change your email”- Under Change email, enter the New email and your Current password (leave it empty if you sign in only with Google, GitHub or an emailed link – you then need to have signed in within the last 15 minutes).
- Click Send confirmation.
- Open the email Frontmail sends to your current address and click Approve the change.
- Open the link Frontmail then sends to the new address. The change takes effect once you confirm it, and the old address gets a notice.
How to change your password
Section titled “How to change your password”- Under Change password, enter your Current password and the New password. The button unlocks once the strength meter rates the new password as strong enough.
- Keep Sign out of all other devices on if you want every other session ended (recommended if you suspect someone knows your password).
- Click Change password.
Sessions
Section titled “Sessions”Active sessions lists every device where you’re signed in – browser and operating system, IP address and when you signed in. Your current session is marked This device.
- Click Sign out next to a session to end it.
- Click Sign out everywhere else to end all sessions except the current one.
Your data & account
Section titled “Your data & account”How to export your data
Section titled “How to export your data”Click Request export. Frontmail prepares a JSON file with your data – profile, memberships, the organizations you own with their members, templates, services (without secrets), contacts and message metadata – and emails you a download link. You can request up to three exports a day.
How to delete your account
Section titled “How to delete your account”- Click Delete account.
- Read the warning. Enter your Password – accounts created with Google or GitHub don’t need one, but you may have to sign in again first.
- Type your email address into the confirmation field and click Delete account.
You’re signed out on all other devices and your account is deleted after 30 days. Organizations you own are deleted too – transfer ownership first if others should keep using them (see Team and roles). You’ll get a confirmation email.
Until the date, the section shows Your account will be deleted on …. Click Cancel deletion to keep your account.